The only motivation I had behind learning service workers was to access an app offline, so we'll know and understand how to do that using a simple demo project.
Here're a few things we'll cover as part of this blog:
What is a Service Worker?
How to add a service worker?
Lifecycle of a service worker
Different caching strategies
Some slight UX improvements using a service worker
What is a Service Worker?
A JavaScript asset that acts as a proxy between browser and server. If we’ve any service worker installed, all requests go through the service worker before going to the web. It sits in the browser between the app and the rest of the internet.
Service workers run on their own thread and give access to the Cache API which could be used to implement precaching or runtime caching based on the requirements.
Since the service worker gets installed in the browser, the question might arise: how to check if there's any service worker already installed for any app currently running in my browser?
Press command + option + I if you're on Chrome and using Mac or, right click on the page, go to inspect to open the dev tools, go to Application tab, under Application tab, there's a section called Service Workers where we can see if the service worker is already registered and running for any particular application.
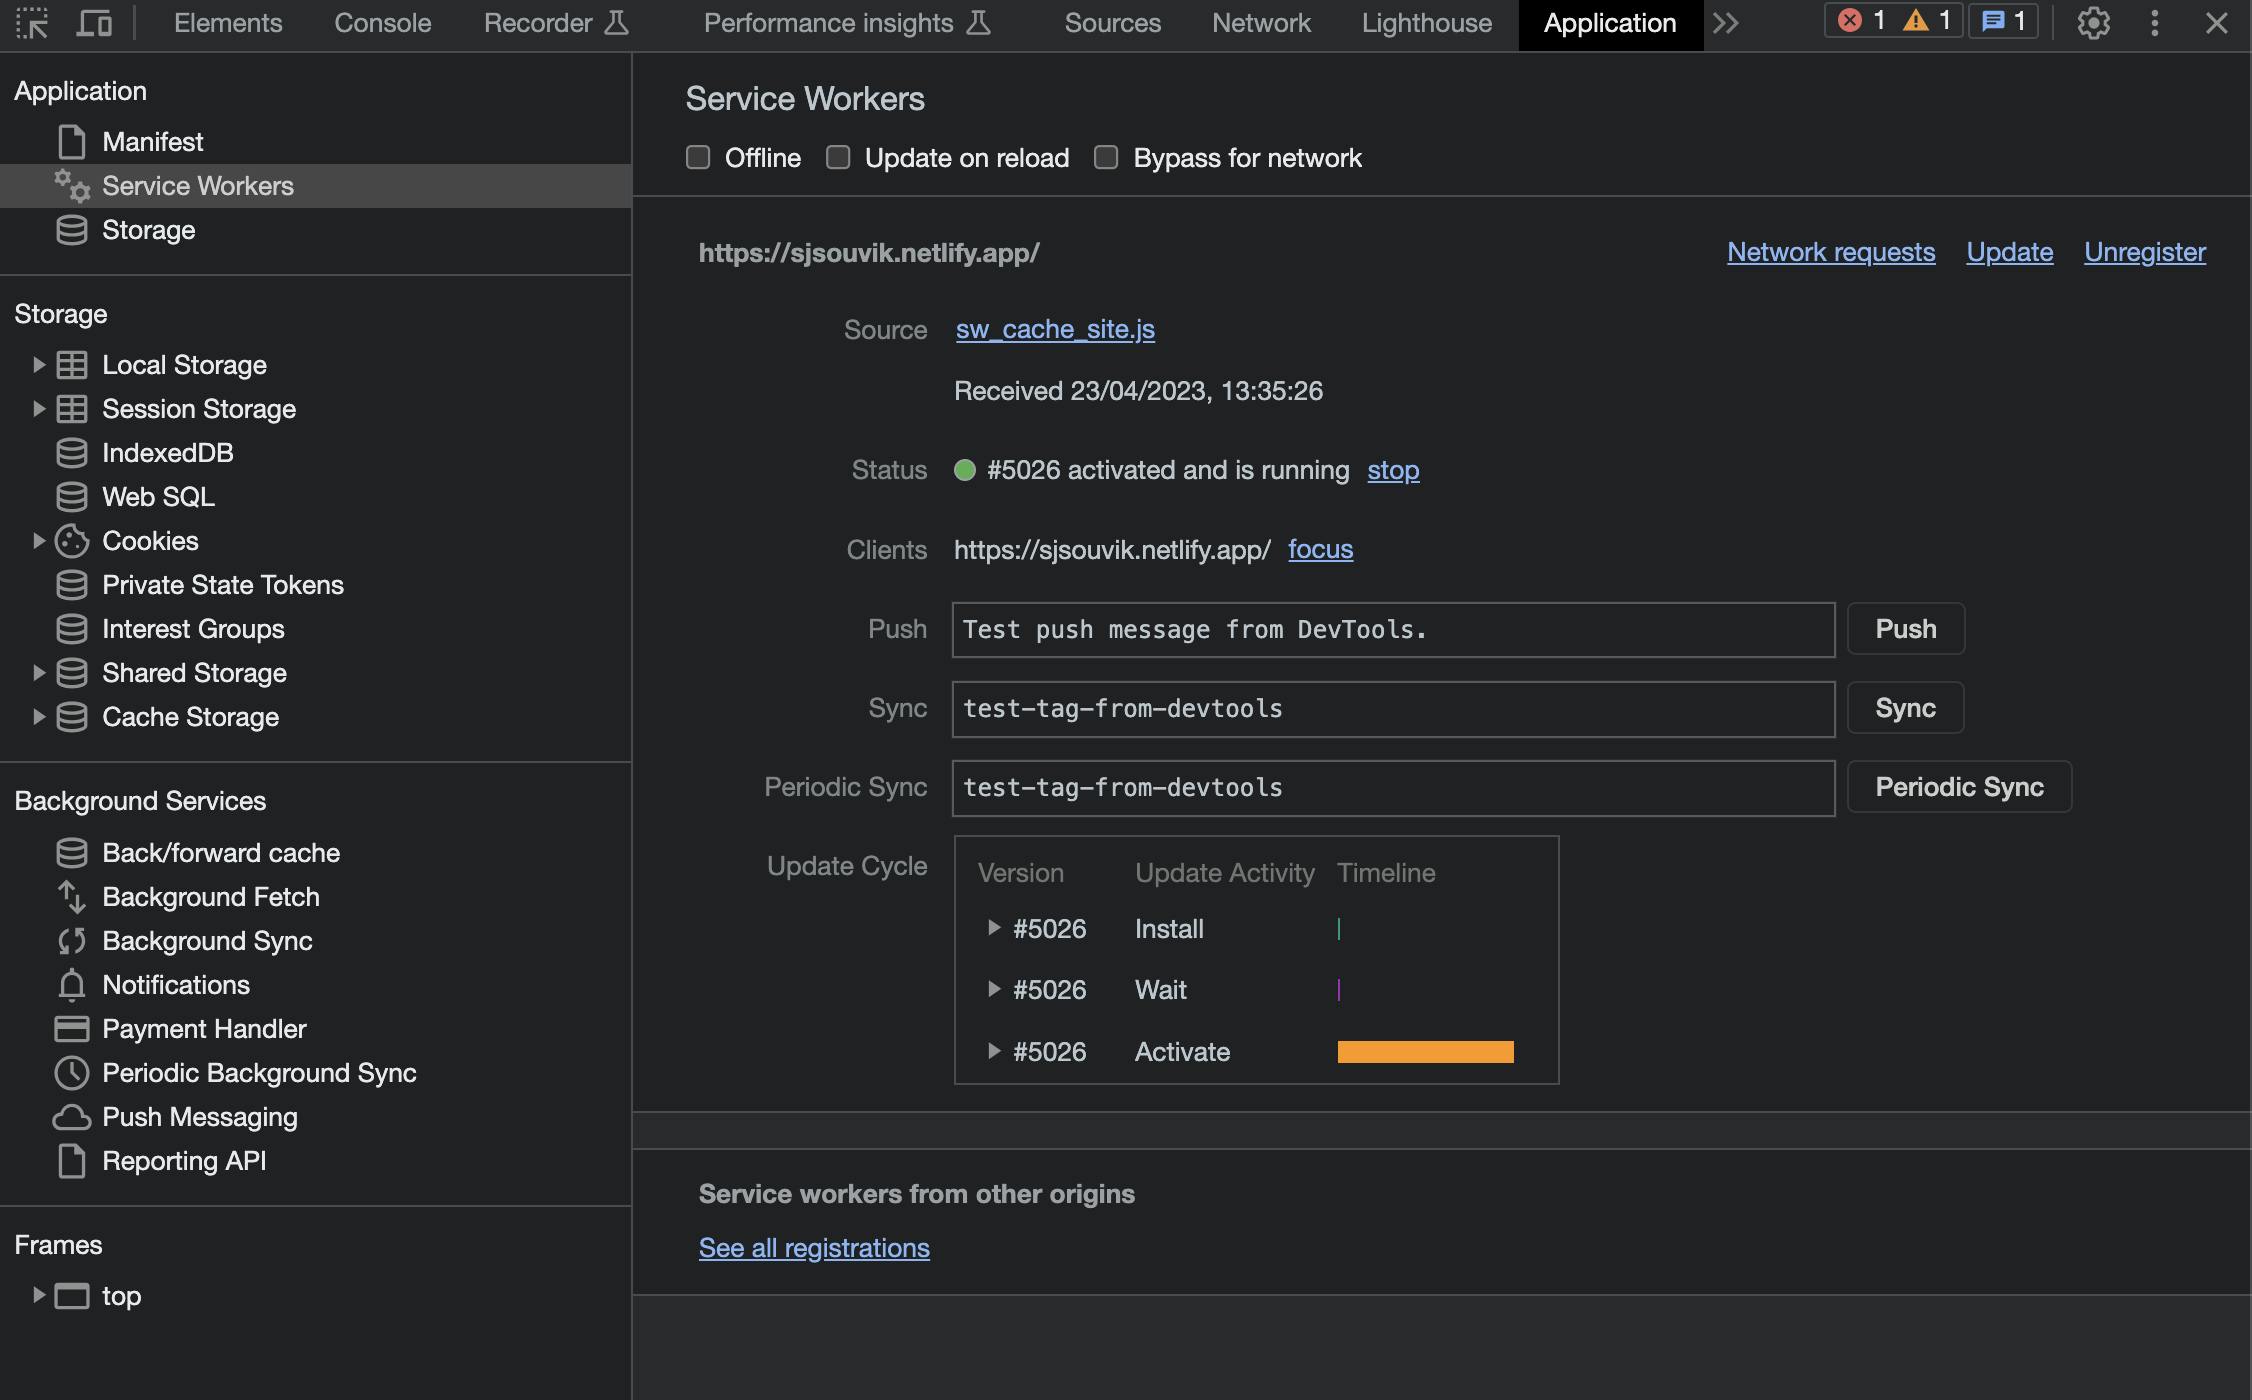
Here we have a few things to notice in the above screenshot, this shows the followings:
Application URL:
https://sjsouvik.netlify.app/Source: it shows the service worker file name which we can click and check the source code of the service worker as I mentioned in its definition that this is nothing but a JS file.
Status: It shows the current lifecycle phase of the service worker, we'll understand more about this shortly.
There's also a checkbox called Offline which we would be using later to go offline and test our demo app.
How to add a service worker?
I have created a demo project using plain HTML, CSS, and JS so that we can have a better understanding, you can find the source code here. We'll add an external JS script to register a service worker.
// inside index.js file
/* to check whether service worker is supported or not in the browser and then register it accordingly */
if ("serviceWorker" in navigator) {
  window.addEventListener("load", () => {
    initServiceWorker();
  });
}

function initServiceWorker() {
  navigator.serviceWorker
    .register("sw.js")
    .then(() => console.log("Service worker is registered successfully"))
    .catch((error) =>
      console.error(`failed to register service worker, error: ${error}`)
    );
}
Service workers are terminated when not being used for some time(40 seconds or so) and enabled again on the next network request.
Visit chrome://serviceworker-internals to see all the installed service workers and observe the scope, running status, the script for the service worker, etc. for one of the installed service workers.
The life cycle of a service worker:
Once the Service Worker is registered successfully, it goes through the following phases:
Install:
This is an event that gets triggered once the service worker is registered. During this phase, we can also cache all the resources of the app which is also known as precaching.
// inside sw.js file

const version = 3;
const cacheName = `portfolio-v${version}`;

const cacheAssets = [
  "index.html",
  "projects.html",
  "blogs.html",
  "styles.css",
  "index.js",
  "blogs/things-i-wish-someone-told-me-during-my-college-days.html",
  "images/hero.svg",
  "images/heroProject.svg",
  "images/heroBlog.svg",
  "images/heroBlogCollege.svg",
];

self.addEventListener("install", (event) => {
  console.log("Service worker is installed");

  /* caching all the assets during install event, this is also known as precaching */

  /* caches.open(cacheName) - this will create a new entry in the cache storage with the given cache name */

  event.waitUntil(
    caches
      .open(cacheName)
      .then((cache) => {
        console.log("Caching assets");
        cache.addAll(cacheAssets);
      })
      .then(() => self.skipWaiting())
  );
});
While the service worker is performing some operation, the browser might shut down the service worker, to avoid that we can use event.waitUntil() method to tell the browser to wait while it’s doing some operation during the install/activate phase.
Wait:
Whenever we do any changes(adding a new character, uncommenting some code, etc.) in our service worker file, the browser loads the updated service worker and it goes through its lifecycle(install, wait, activate). Once the service worker is installed, it goes to the waiting phase. To skip the waiting phase and directly activate the updated service worker, we can use skipWaiting method in the install event handler.
// inside sw.js file

self.addEventListener("install", (event) => {
  console.log("Service worker is installed");

  /* to skip waiting phase, so that any new service worker don't wait for the other service worker to get destroyed and moves to the activate phase once it's installed */
  self.skipWaiting();
});
Activate:
When the service worker is installed and the waiting phase is completed or skipped, it gets into the activate phase, and the old service worker gets removed. This is also an event just like install where we can delete the old caches.
// inside sw.js file

self.addEventListener("activate", (event) => {
  console.log("Service worker is activated");

  // removes the old caches
  event.waitUntil(
    caches.keys().then((cacheNames) => {
      return cacheNames.map((cache) => {
        if (cache !== cacheName) {
          console.log("Clearing old caches");
          caches.delete(cache);
        }
      });
    })
  );
});
Now, if you're curious to know where we can check after caching some resources or removing some old caches - open chrome dev tools, visit the application tab and there we have Cache Storage, refer to the image below:
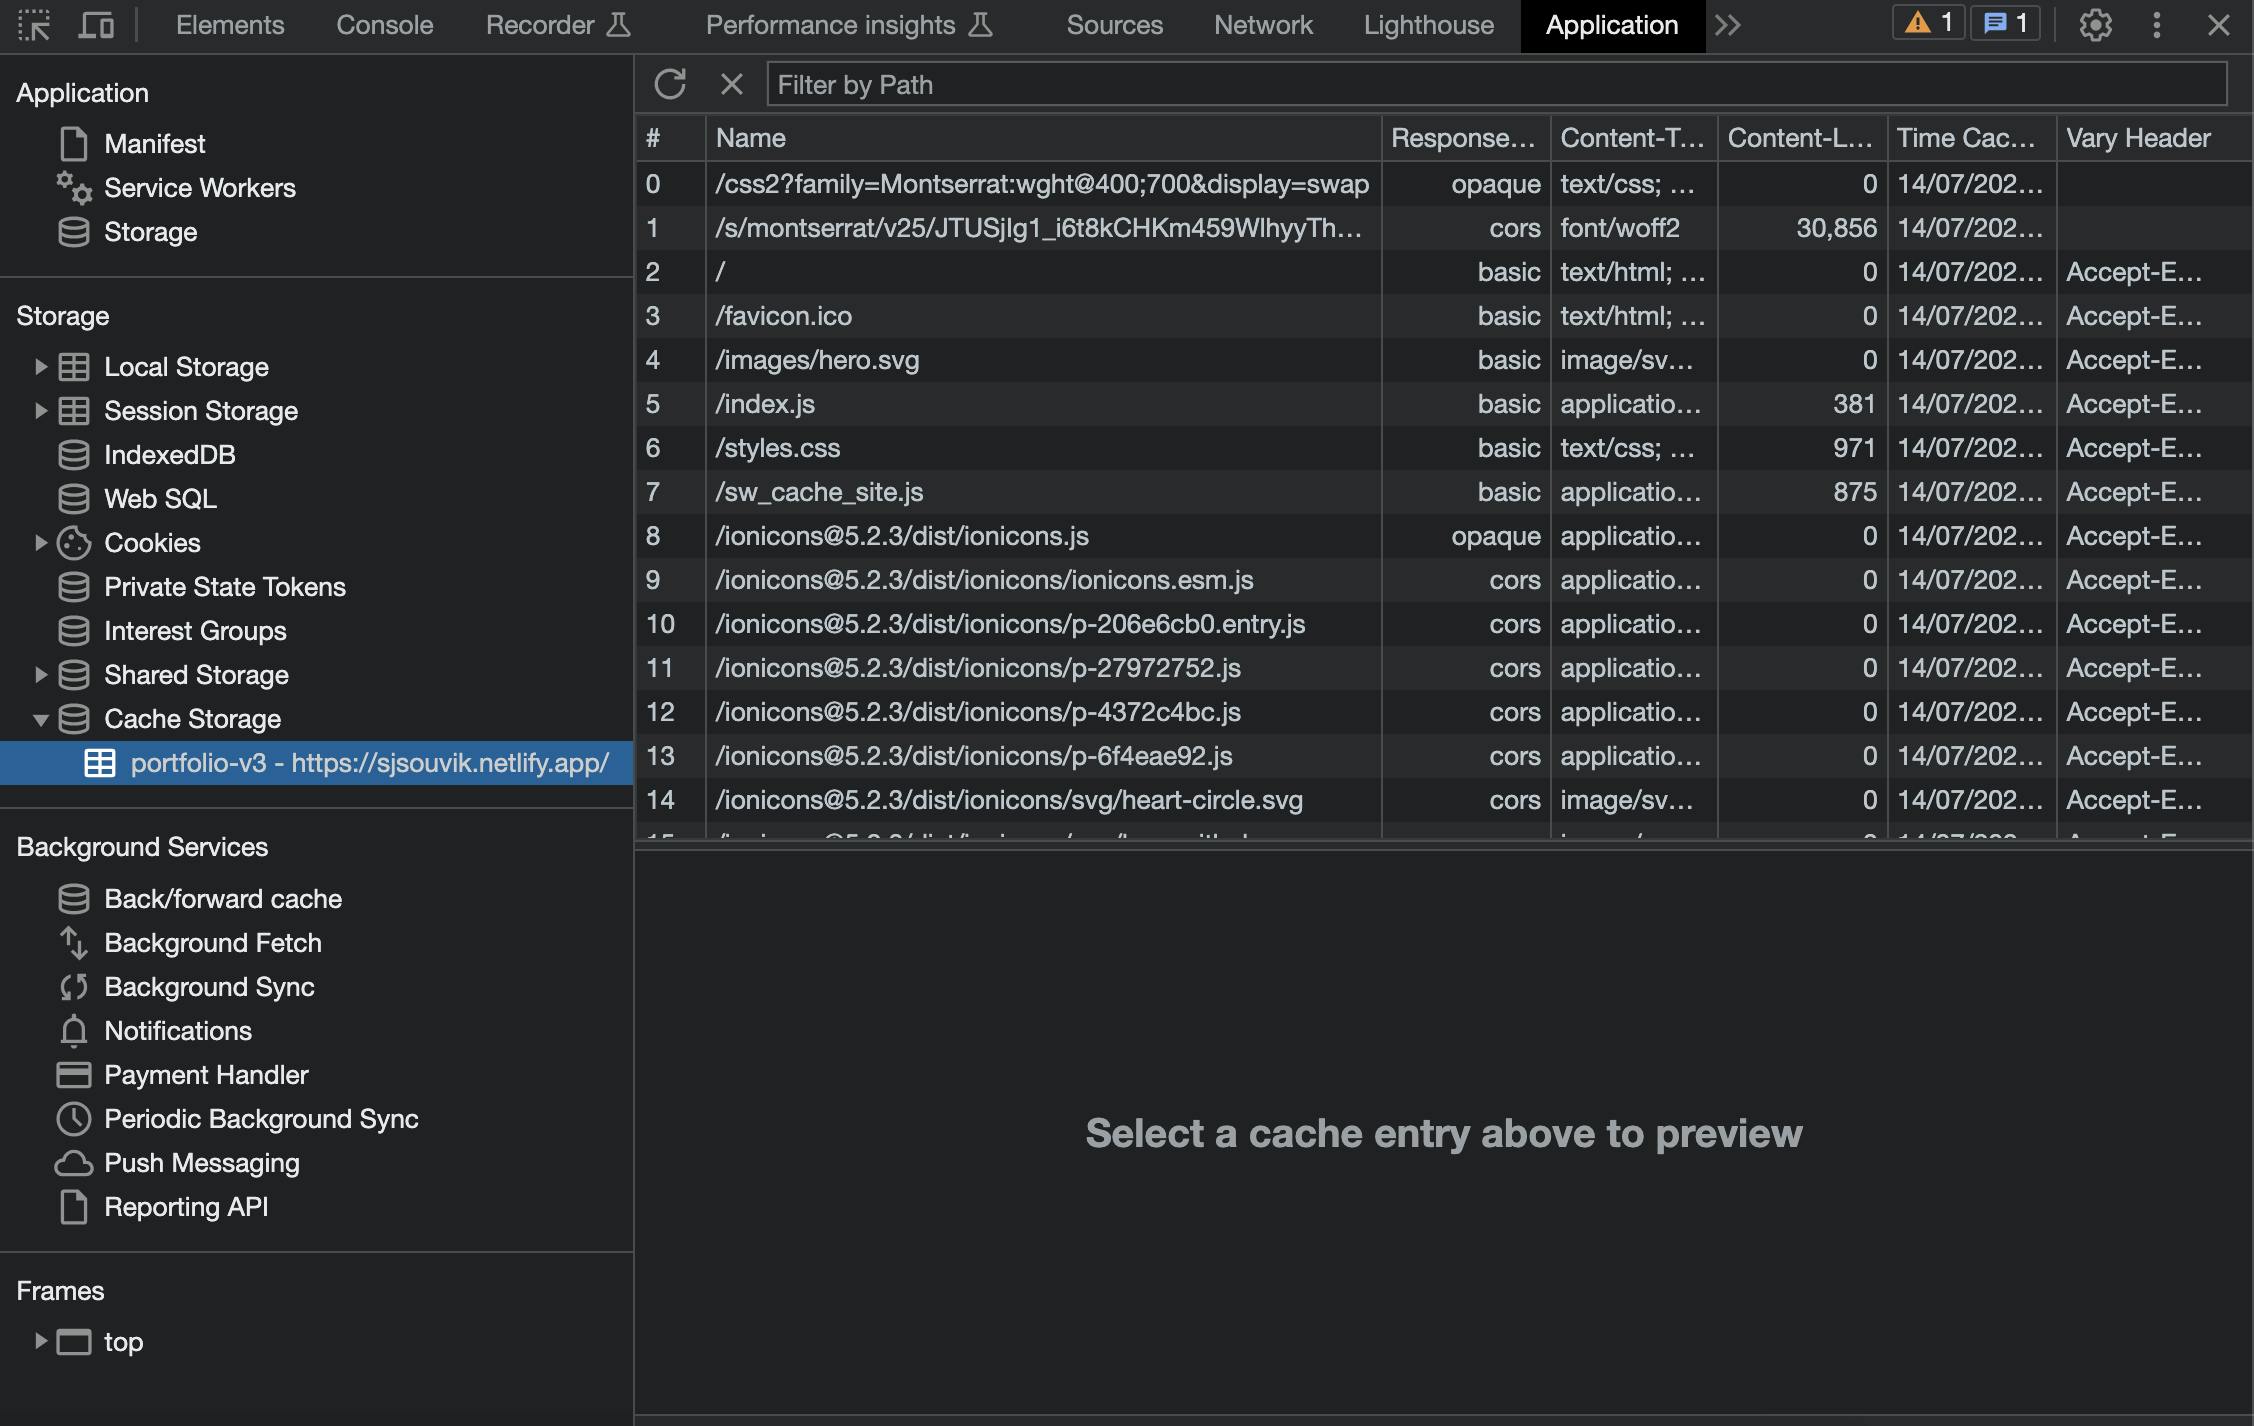
We can check the cache storage for the cached assets, and access, and delete them if required.
As of now, we have registered a service worker, and added different events to cache app resources(using precaching), let's see how to serve the cached resources in case we're offline and trying to access the app.
// inside sw.js file

self.addEventListener("fetch", (event) => {
  console.log("Fetching via Service worker");
  event.respondWith(
    fetch(event.request).catch(() => caches.match(event.request))
  );
});
We use the fetch event of the service worker to intercept the network request and serve the resources from the cache in case it fails to access them over the actual network.
This is how the service worker file would look after all the implementations so far.
// inside sw.js file

const version = 1;
const cacheName = `portfolio-v${version}`;

const cacheAssets = [
  "index.html",
  "projects.html",
  "blogs.html",
  "styles.css",
  "index.js",
  "blogs/things-i-wish-someone-told-me-during-my-college-days.html",
  "images/hero.svg",
  "images/heroProject.svg",
  "images/heroBlog.svg",
  "images/heroBlogCollege.svg",
];

self.addEventListener("install", (event) => {
  console.log("Service worker is installed");

/* caching all the assets during install event, this is also known as precaching */
  event.waitUntil(
    caches
      .open(cacheName)
      .then((cache) => {
        console.log("Caching assets");
        cache.addAll(cacheAssets);
      })
      .then(() => self.skipWaiting())
  );
});

self.addEventListener("activate", (event) => {
  console.log("Service worker is activated");

  // removes old caches
  event.waitUntil(
    caches.keys().then((cacheNames) => {
      return cacheNames.map((cache) => {
        if (cache !== cacheName) {
          console.log("Clearing old caches");
          caches.delete(cache);
        }
      });
    })
  );
});

self.addEventListener("fetch", (event) => {
  console.log("Fetching via Service worker");
  event.respondWith(
    fetch(event.request).catch(() => caches.match(event.request))
  );
});
We can also cache at the runtime once the resources are fetched for the first time which is also known as runtime caching. But, using this strategy, users can only access the already visited pages of the app while it's offline.
self.addEventListener("fetch", (event) => {
  console.log("Fetching via Service worker");

/* caching all the assets while fetching for the 1st time during user's navigation from one page to the other, not during install event, this is known as runtime caching */
  event.respondWith(
    fetch(event.request)
      .then((res) => {
        const clonedResponse = res.clone();

/* The open() method of the CacheStorage interface returns a Promise that resolves to the Cache object matching the cacheName. If the specified Cache does not exist, a new cache is created with that cacheName and a Promise that resolves to this new Cache object is returned */
        caches
          .open(cacheName)
          .then((cache) => cache.put(event.request, clonedResponse));

        return res;
      })
      .catch(() => caches.match(event.request))
  );
});
That's all about caching assets using service workers and now we can access our app offline 🎉.
Please visit this URL to find the hosted app and test it offline using the offline checkbox(if you remember we talked about it earlier in the context of testing the app offline) that we saw in the Application tab under Service Worker section.
Note: Currently, runtime caching is enabled in the app, so you would be able to access the already visited pages only.
Cache serving strategies:
Since the caching part is done, let's explore different strategies that we can follow to serve the cached resources.
Cache first:
As the name says, we try to access the required resource from the cache first, if that fails then fetch it over the actual network.
self.addEventListener("fetch", (event) => {
  event.respondWith(
    caches
      .open(cacheName)
      .then((cache) => cache.match(event.request))
      .catch(() => fetch(event.request))
  );
});
Network first:
Go to the network first to get the resource, if that fails then try to access it from the cache.
self.addEventListener("fetch", (event) => {
  event.respondWith(
    fetch(event.request).catch(() =>
      caches.open(cacheName).then((cache) => cache.match(event.request))
    )
  );
});
Stale-while-revalidate:
This is the complex one where we try to access the asset from the cache which would fail obviously if we're requesting an asset for the 1st time, in that case, fetch it over the network, keep it in the cache, and return the network response. On the subsequent requests, serve the asset from the cache, still make a network call to fetch the asset and update its entry in the cache.
In this way, we make sure, we always have the latest version of an asset in the cache.
self.addEventListener("fetch", (event) => {
  event.respondWith(
    caches.open(cacheName).then((cache) => {
      cache.match(event.request).then((cachedResponse) => {
        const fetchedResponse = fetch(event.request).then((networkResponse) => {
          cache
            .open(cacheName)
            .then((cache) => cache.put(event.request, networkResponse.clone()));
          return networkResponse;
        });

        return cachedResponse || fetchedResponse;
      });
    })
  );
});
Service worker handles requests for different files only inside the folder where it’s located. So, if we have our service worker file inside
/js/sw.jsfolder then, it would only handle requests for any asset inside thejsfolder, which might create issues if we want to handle requests for all assets inside the root folder. Hence, it’s recommended to keep the service worker file inside the root folder only.
UX improvement:
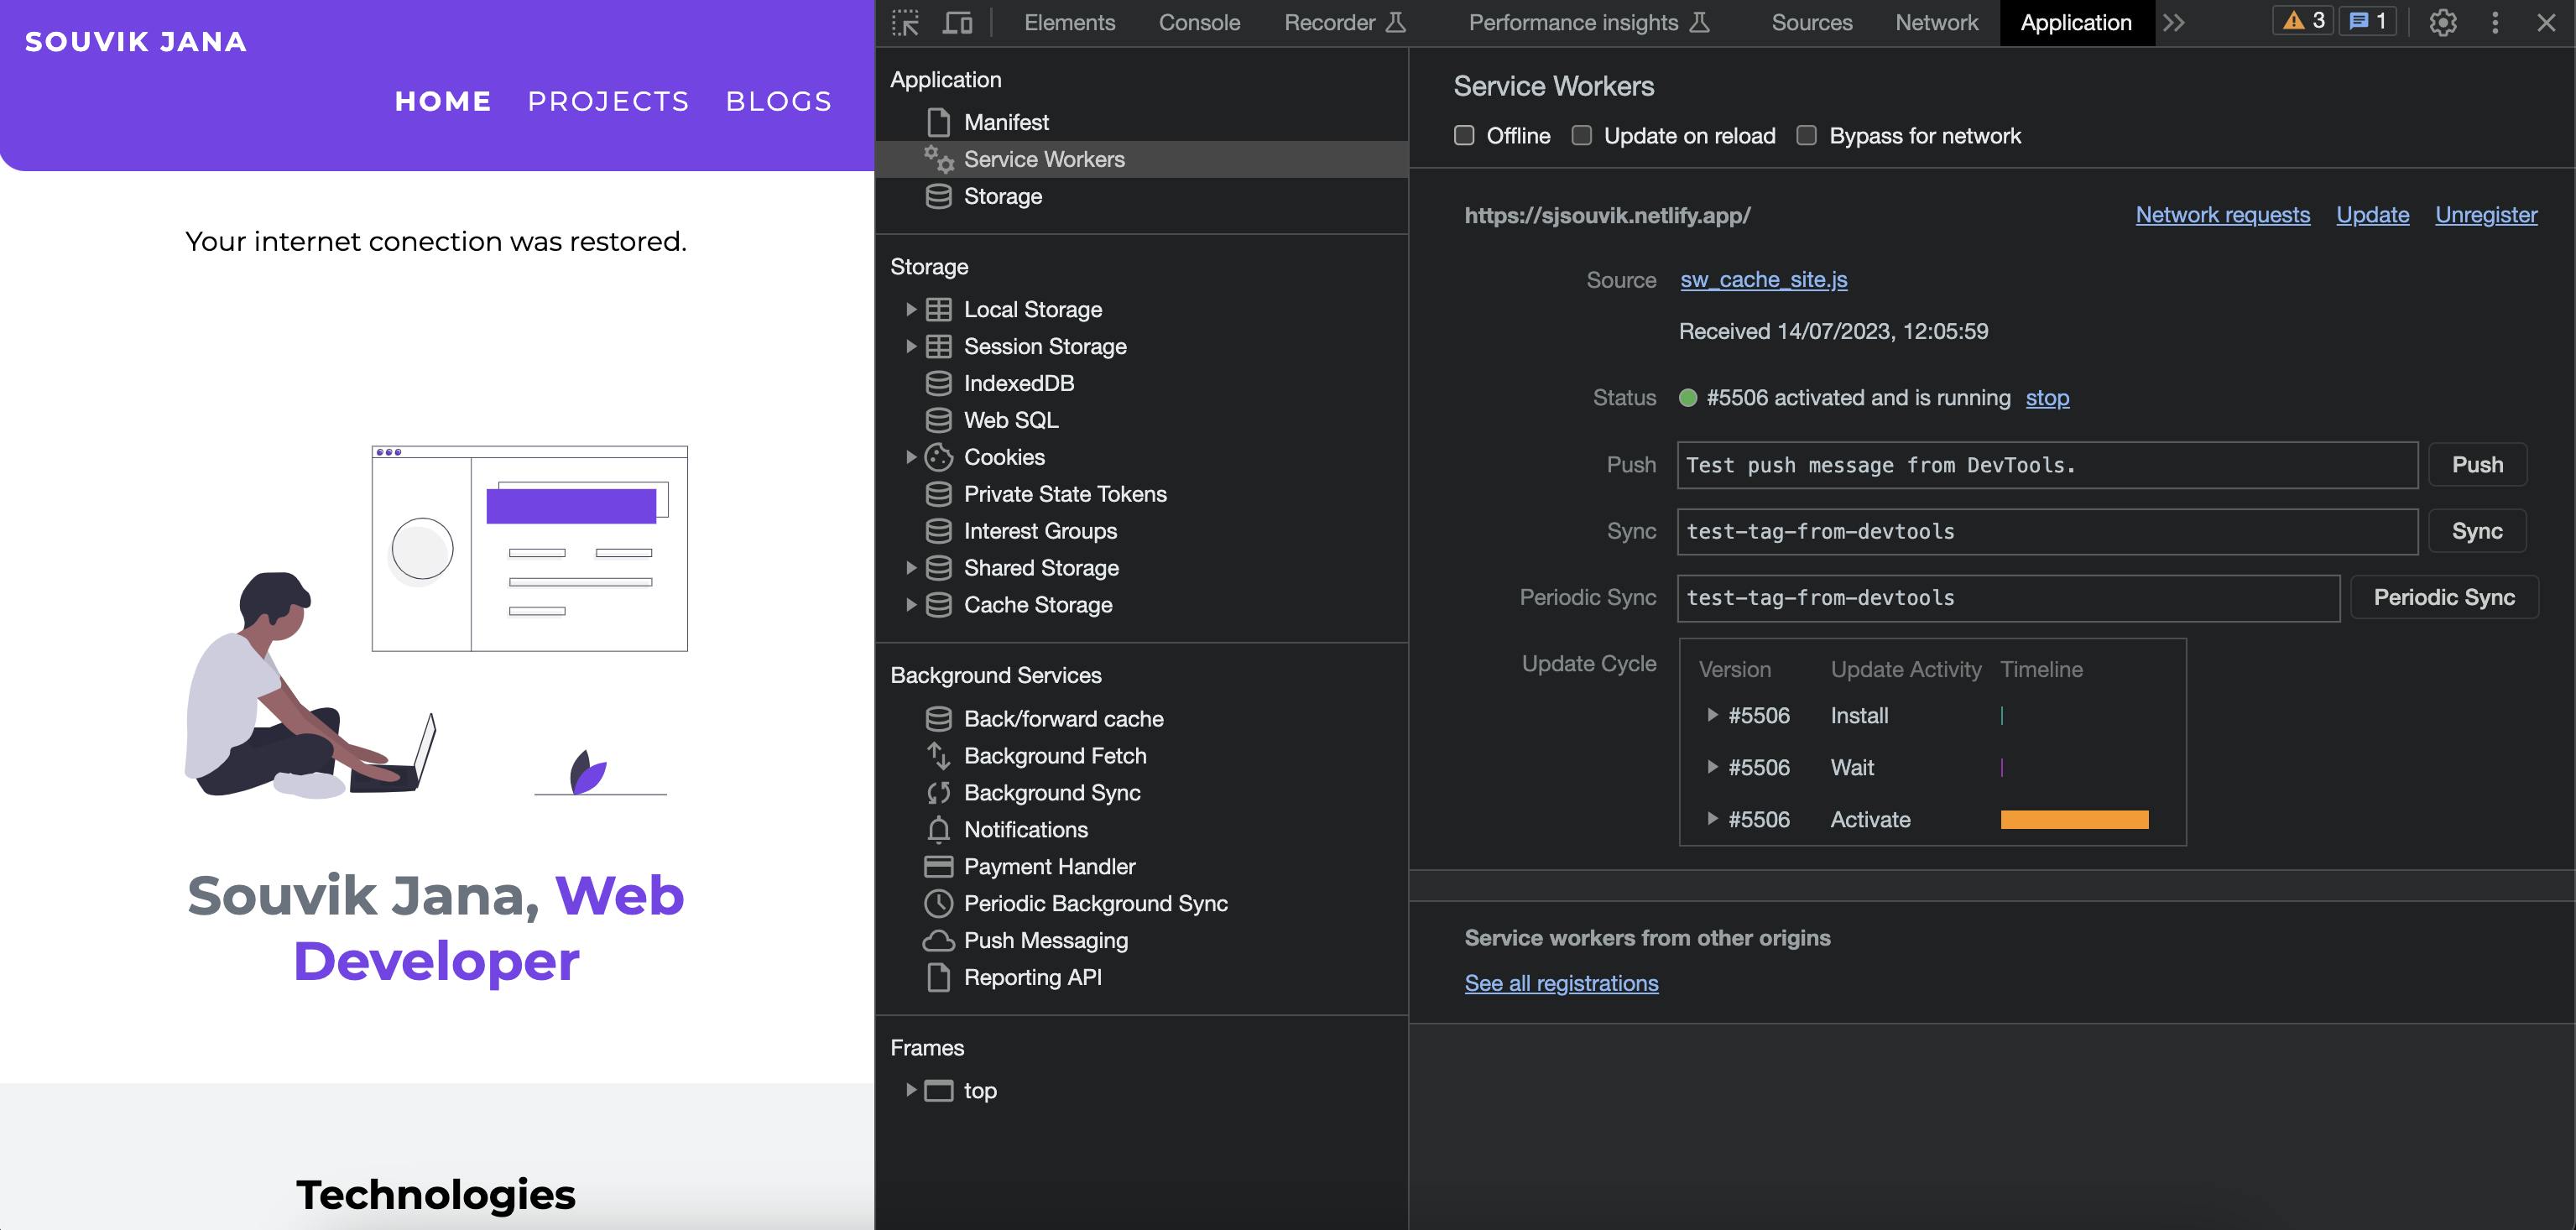
One small UX improvement, we can also do with service workers is showing the connectivity status to our users whenever it goes offline or comes online.
function showConnectivityStatus() {
  let isOnline = navigator.onLine;
  const statusSec = document.getElementById("onlineStatus");

  if (!isOnline) {
    statusSec.textContent = "You're currently offline.";
  }

  window.addEventListener("online", () => {
    statusSec.textContent = "Your internet conection was restored.";
    isOnline = true;
  });

  window.addEventListener("offline", () => {
    statusSec.textContent = "You're currently offline.";
    isOnline = false;
  });
}
We can use the above function to implement that and invoke this function while registering the service worker.
if ("serviceWorker" in navigator) {
  window.addEventListener("load", () => {
    initServiceWorker();
    showConnectivityStatus();
  });
}
This is how it would look depending on the connectivity status:
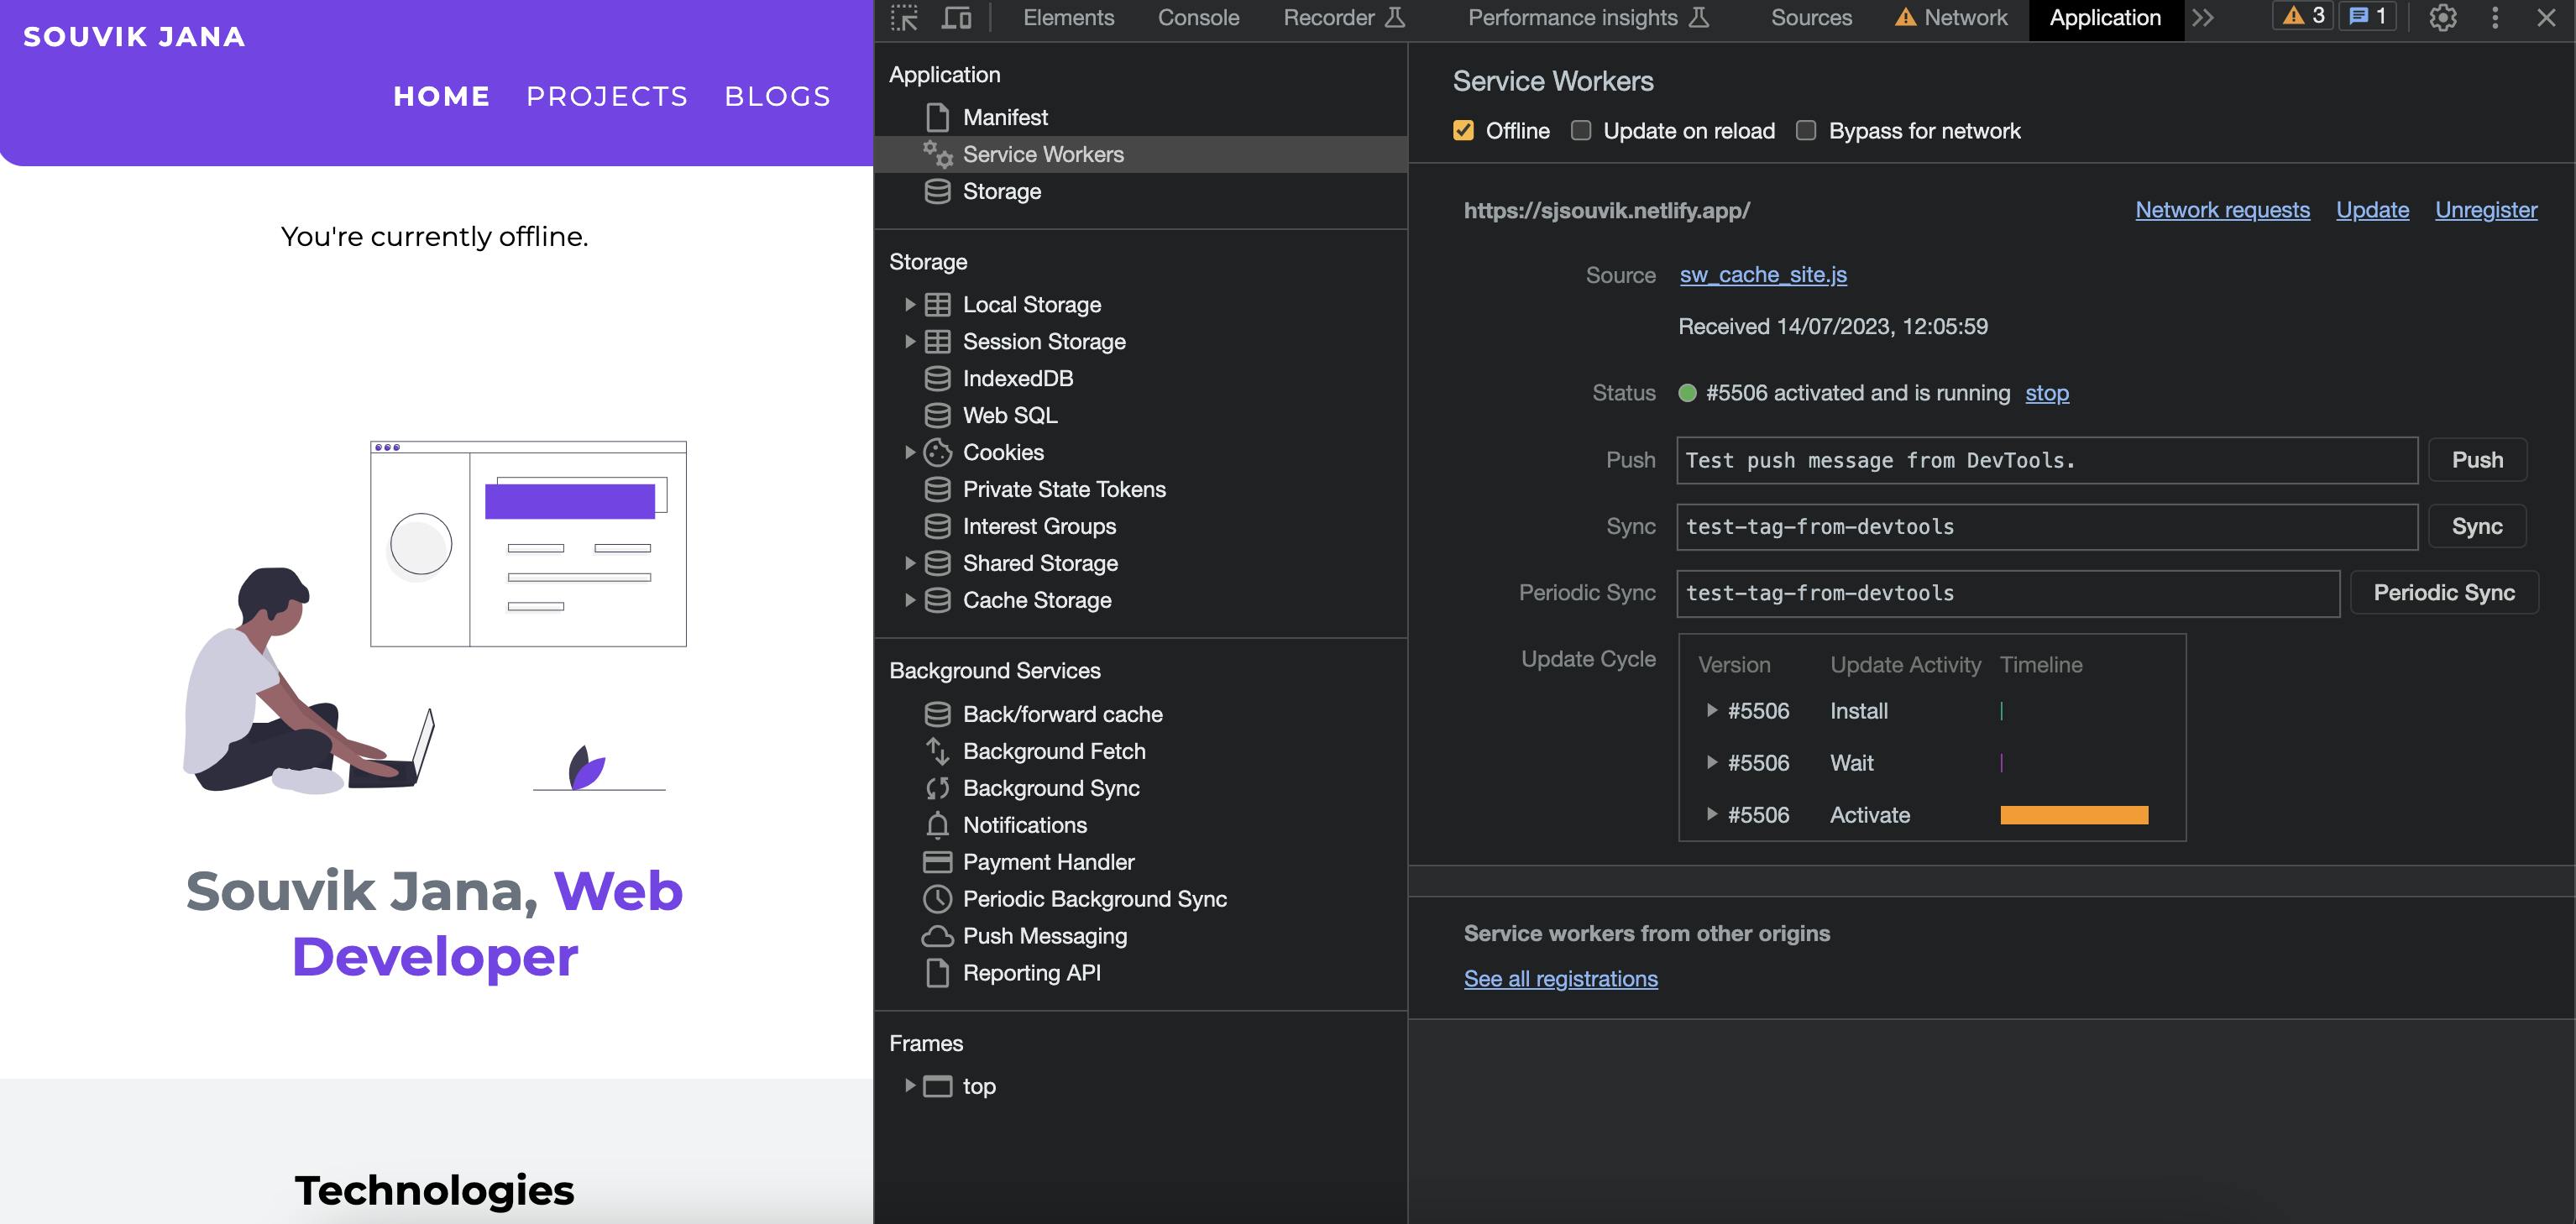
When the app comes back online:
That's all I wanted to cover as part of this blog 😃. Thanks for reading till now 🙏.
You can find the source code of the project here.
We discussed a lot of things around plain service workers, however, there's a library called Workbox which makes our life easier to use service workers. Since service workers solve hard problems, any abstraction on top of that would also be tricky without understanding it.
It’s recommended to use Workbox instead of vanilla service worker if we’re building any mid to large-size app. Also, different modern UI libraries or frameworks CLIs like CRA, vue-cli, etc. use workbox to have offline support.
Share this blog with your network if you found it useful and feel free to comment if you've any doubts about the topic.
